Stop importing Multiple Fonts and Start using Variable Fonts
10 May, 2020 • ☕️ 2 min read
Variable Fonts.
Maybe you already know all about them.
Maybe you have no clue what they are.
In this short article, I’ll take you through how you can use variable fonts to your advantage in creating efficient & fun websites.
Introduction
Variable fonts sure are something cool! They allow you to dynamically change certain properties of a typeface/font.
Why is this cool?
Well, normally when using a custom typeface, you will need to import a ton of different fonts.
For example, let’s say you want to use the typeface “Roboto” and use a regular font-weight (400), a bold one (700), and a black one (900).
You will need to import all three of these fonts, which can affect your page’s performance pretty badly.
Imagine needing even more different typefaces and fonts!
This is where variable fonts come into play.
Instead of needing to import multiple fonts for all the different weights and italics you are using, you need to import just ONE.
Follow along
So to follow along with this article you can open up your text editor, but I also created a couple of Sandboxes so you can see how it works without having to touch any code yourself.
These are the steps we will be following:
- Link to the Font
- Set the Weights
- (extra) Change the Weights
That’s all you’ll need 😄
Link to the Font
So to start, we’re going to need one of those variable fonts.
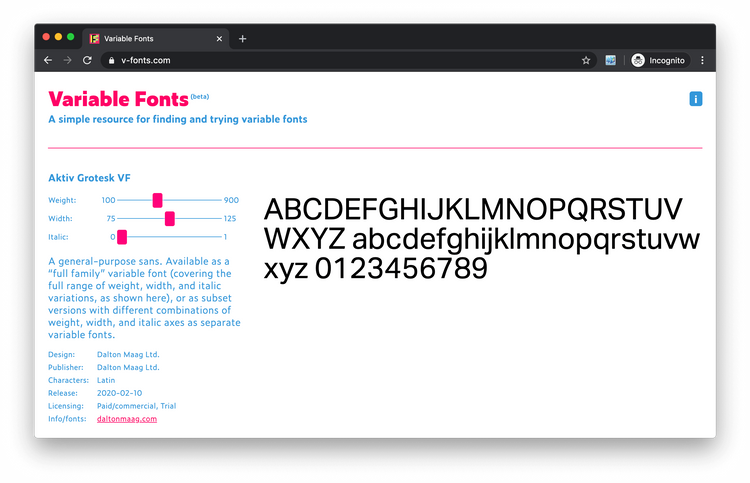
There’s this great resource called v-fonts.com where you can find loads of them.
I found a great font called “Roboto Delta” hosted here. I’ll be using this from here on.
Once we’ve found our variable font, we can start link to it in our CSS file.
First, we use the @font-face rule to import the font.
@font-face {
   font-family: "Roboto Delta";
   src: url("https://googlefonts.github.io/fluid/assets/fonts/RobotoDelta_v2-VF.ttf") format("truetype");
}
Then, we define which font weights will be used. For this article, we’ll be using the full range (100–900).
@font-face {
   font-family: "Roboto Delta";
   src: url("https://googlefonts.github.io/fluid/assets/fonts/RobotoDelta_v2-VF.ttf") format("truetype");
   font-style: normal;
   font-weight: 100 900;
}
Great! Now the font is ready to use 🥳
Set the Weights
Now that we’re ready to use our variable font, let’s see how.
I’ve created a text-element inside a sandbox to start off.
The standard font-weight is 400.
We can change this using the“font-variation-settings”CSS property.
This property takes an axis you want to change (weight/width/italics/etc.) and the desired value.
For example, we can use set the font-weight to 900 by using:
h1 span {
   font-variation-settings: "wght" 900;
}
In the sandbox below, I’ve set one of the texts font-weight to 100, and the other to 900.
Great! The cool thing about this is that we don’t have to set this font-weight to a perfectly round number.
So instead of using 100/200/300/etc. we can use any number in between.
We’ll be using this in the final/extra step!
(extra) Change the Weights
Now that we know how to change the properties of a variable font, we can use it to create some awesome effects!
I’ve written a little script that changes the font-weight based on your cursor’s position!
It takes in the cursor’s position on the X-axis, calculates how far it is positioned to the left/right, and sets the font-weight accordingly.
const words = document.querySelectorAll("span");

const updateFontWeight = cursorXPosition => {
   const xPercentage = cursorXPosition / window.innerWidth;
   const fontWeight = 800 * xPercentage + 100;

   words.forEach((letter, i) => {
      setTimeout(function() {
        letter.style.fontVariationSettings = "'wght' " + fontWeight;
      }, 120 * (i * 0.3));
   });
};

document.body.addEventListener("mousemove", e => {
   updateFontWeight(e.clientX);
});
And here we go:
Move your mouse inside the Sandbox!
Here’s a GIF of the effect if you’re on mobile:

Conclusion
Looking back, we’ve used a variable font to create dynamic styling on our webpage. We can do this by importing a variable font in our CSS and then changing its properties using the “font-variation-settings” CSS property.
For a more in-depth article, I highly recommend this one by Mustafa Kurtuldu. He’s a Design Advocate at Google.
Look at how much you’ve learned!
Thank you for reading!
That's an Egg
Personal blog by Twan Mulder.
Making your developer life easier, one article at a time.

